What can be cooked from squid: quick and tasty
It is not always possible or willing to start a serious renovation, but you can change the situation with little time. Even such seemingly hard-to-change materials such as wall or floor tiles or ceramic tiles. In this case, paint for ceramic tiles will help, and other materials will also be needed - primer and, possibly, varnish. But updating the tiles in the bathroom and kitchen is possible not only on the walls, but also on the floor.
From time to time I want to update the interior and the most difficult thing is with coatings that are difficult to replace. These include tiles. And it would be necessary to change it, but when you remember the expenses, the dirt and you don't want anything anymore. Therefore, when the old tile is tired, the new one is not yet assembled, but to refresh appearance we want to start thinking whether it is possible to paint the tiles. In principle, you can. But this is a temporary option. And, as a rule, it is not very durable. Everything looks decent from a few months to three to five years. The period until everything looks good depends on:
Let's say right away that cheap ceramic tile paint is from the realm of fantasy. There is no such option. The price of materials is decent. Maybe only a small area will help you not to spend too much.
Technology and work sequence
Renewing old tiles in a bathroom or kitchen is not so long, of course, than changing them, but the work is not the easiest one. Especially if the tiles are glazed. There are only three stages:

If it comes about staining floor tiles, another step may be required - varnishing. The varnish is taken with increased wear resistance, it tolerates high humidity well. Usually - deck or yacht. They carry the load precisely. But make sure they are compatible with the tile helmet of your choice.
And, nevertheless, a long-term result is not guaranteed. To check, you can carry out work on a small area "where it is not visible." True, the materials should already be there ... In any case, this way you can work out the technique, and in the process, much becomes clearer.
Preparing tiles for painting
From the very beginning, the base must be washed. The paint is applied in a thin layer and even small irregularities - drops of fat, lime streaks - everything will be visible. Therefore, we thoroughly wash and clean. If you decide to paint the floor tiles in the bathroom, first remove all silicones, grout, align and clean the joints.
 Everything starts boringly - with cleaning
 - If you have a grinder, it will simplify the task. We put on sandpaper with a medium grain, we make the surface rough.
- You can try a grinder with a grinding attachment. But it will be too dusty.
- Metal brush.
- Bar wrapped sandpaper with coarse or medium grain. We choose the grain empirically.
After sanding, dust should be removed (with a vacuum cleaner). The following describes the processing.
 Brushes, scrapers, abrasive and non-abrasive detergents - anything to keep the substrate clean
 Some primers have such good "adhesion" that sanding the smooth surface is not necessary (eg Zinsser Bulls Eye). Then the base should be rinsed and degreased. For degreasing, you can use White Spirit 1050 or Pensselipesu detergent. Wait until dry.
What primer to take
The soil must be taken as an adhesive, but not of the type of concrete contact. It leaves a rough surface, which is unacceptable for painting. After applying the primer, the surface must be smooth, therefore carefully read the description and composition. If the line-up includes quartz sand or other abrasives are not our option. You will need a primer with polymers: epoxy, acrylic, polyurethane, etc. In principle, it is necessary to select the paint at once - so that the polymers are compatible.
 The primer usually changes color slightly. Tikkurila has a pigmented tile primer. It will be an excellent base and will give a deep color after painting.
We are looking for a primer for painting tiles in the bathroom and in the kitchen for outdoor work. It is precisely designed for use in rooms with high humidity. We can recommend several primers with suitable properties.

Tikkurila adhesion primers have been tested. They were used specifically for painting tiles, but on the walls of the kitchen and bathroom. In order to paint the floor tiles, this primer will also work. It will be necessary to select a paint and varnish with high resistance to mechanical stress. Surely there are compositions from other manufacturers.
Ceramic tile paint
The main question is how to paint the tiles in the bathroom, in the kitchen. Ceramics are smooth and non-absorbent substrates and there are many paints for such surfaces. They do not belong to the budget category, but not all are very expensive. There are from the middle price range. Look at the characteristics so that there is a high hiding power, strength, the ability to wash, and with brushes. The surface can be glossy or matte. The degree of gloss and haze is different. This alone gives a sufficient number of options even in one color. You can also use templates, stickers, and other techniques.
The paint for ceramic tiles can be:

When you decide to paint the tiles in the bathroom or kitchen, immediately look for a pair - primer and paint. They must fit together. Typically, paint manufacturers recommend certain primers. Look through the recommendations, perhaps you will find what you need and you will not have to think about the compatibility of the formulations.
How to change the look of ceramic tiles without painting
What materials do not buy, but in the "wet zone", where water is frequent or constant, the paint will peel off quickly. This is usually the wall near the bathroom. It's not a good idea to paint ceramic tiles here. If you want to update your tiles, you can use self-adhesive tape. Not the cheapest, but the one that is more expensive - carbon fiber. It is used for car tuning. It is denser, better glued and held.
If the grout between the seams looks "not very" or does not match the color, before gluing the film, remove the old grout, apply a new one. Choose the color taking into account the new colors. When grout is dry, remove residue and wash. Then you can already deal with updating the tile.

In this case, before updating the old tiles in the bathroom or on kitchen apron, we wash it. We cut the film into squares or rectangles - according to the size of your tile. It looks better if the edge of the tile is visible, but this is a matter of taste.
Before gluing the film, degrease and dry the tiles. Then you can glue. The gluing technique is simple:

Actually, that's all. Let's move on to the next snippet. Nothing fancy, the surfaces are small. If the tiles are embossed, you will also need a hairdryer. If there is a building one - great. No, the usual one will do. We set the building temperature to the minimum temperature, the hairdressing salon to the maximum. We begin to glue from the flat part. Then we heat the film, stretch it a little and glue it to the relief. Do not pull too hard. It becomes elastic. You can practice for a start.
(1 votes, average: 3,00 out of 5)
If, for whatever reason, the appearance of the tiles in the kitchen, toilet or bathroom does not suit you, and for obvious reasons you don’t want to start repairs and dilute the dirt in the house, there is no other option but to paint the tiles.
Indeed, the situation is not so rare when the quality of the old masonry has already been violated, the tile itself becomes unusable from prolonged use, or simply the old design of the finish is pretty fed up, and you have to puzzle over how to decorate the tile and at the same time do without large-scale renovation. It is painting here that is the most optimal solution, and we will consider how to do it in our article.

Tools and materials for work
There is nothing difficult in painting the tiles, even if the old masonry is broken. Even though the process itself consists of several parts, the work itself is quite simple. It is only important to choose the right materials for use in painting.
To paint ceramic tiles correctly, you will need the following materials:
- a primer solution (for example, based on an epoxy mixture);
- tile paint;
- brushes;
- rollers;
- protection for hands and eyes.
By the way, there is also a special tile, which is produced specifically for painting. It has a coating that is designed just to be painted with a special paint.

Tile painting instructions
Now let's look directly at how you can paint the tiles:
- Before deciding what to paint the tile, first you need to clean it of grease, dirt or other deposits that have accumulated on the tile during operation.... This is done using ordinary hot water with the addition of detergent - any will do - Vanish, Fairy, you can take not very expensive ones, including ordinary soap.
- The product is stirred in water until foam forms., then the tile is wiped with a cloth dipped in a weak vinegar solution or in any alcohol-containing agent.
- sanded with fine-grained emery paper... The tile is carefully coated with epoxy primer, and all seams must be very carefully processed.
- The treated tile surface must dry properly- it will take about one day. After the tile dries, you need to lightly sand it. The last operation is performed so that the tile paint adheres well to the epoxy primer.
- The primer and paint must be diluted in exactly the amount required to finish the surface chosen for work.... This is necessary because the solution loses its working properties after a short time. The best effect is obtained by painting tiles, made with a properly aged solution, that is, they are used within the time specified in the instructions.
Advice!
Before painting, the paint should be mixed as best as possible.

- We paint in this way: paint is applied to the tile even movements
... Opened paint must certainly be used within six hours after it has been printed - it is better not to check whether the tiles can be painted after this time, the paint will disappear anyway.
When the first coat of paint is applied to the tile, it must be left alone for a while - it will take about twelve hours to dry. - After the first layer dries, you can start applying the second... To do this, take the next portion of the tile paint, mix it thoroughly and start applying - the roller must be replaced with a new one.
If you want to darken the shade, you will also need to apply a third layer, but do not forget that the previous layer must be completely dry. - After painting is finished, everything should be well dried within three days.... To finish, the seams must be filled with any of the most convenient methods.
How and with what tile is painted
Now let's look at how and with what you can paint the tiles.
It is better to apply the paint in several layers - a period of at least half a day must be kept between application. If you use different colors of paint and tiles, for example, white paint on tiles is applied to black tiles, you can also make a third layer.

Advice!
If, in the toilet, in the kitchen, the oil paint must also be covered with a layer of varnish.
This will prevent the coating from peeling off when exposed to high temperatures or moisture.
In coloring it is better to use paints specially designed for this. An assortment of paints that are suitable for coloring tiles is present in any hardware store, you just need to consult with the seller, who will most likely select the option most suitable for you.
Can the tiles be painted with a different paint? You can use, except for special ones, any of the expensive brands. There is no need to save at the same time - this will lead to the fact that the coating will quickly begin to peel off. The best effect is given by the use of car enamels.
If you still had no idea how to paint a tile, then you should not be afraid in any case: as mentioned above, the process is very simple even for beginners who are just comprehending the art of independently arranging their own home.
Over time, the tile in the toilet or bathroom loses its original shine, becomes covered with a mesh of small cracks, or acquires other external defects. Renovating a bathroom with a complete tile replacement is costly. But there are other ways to update the look of bathroom ceramic tiles, including paint.
Can the bathroom tiles be painted?
Painting old tiles in the bathroom
You can only paint the tiles on the walls. The cladding on the floor and ceiling must not be painted, because due to the constant exposure to moisture and hot steam on these surfaces, the paint will quickly peel off. The question posed as to whether it is possible to paint a tile sounds a little incorrect, since the success of painting such a facing will depend on what kind of paint is used.
Bathroom tile paint

Tile paint
In order for the tile to acquire fresh look, not any paint for tiles in the bathroom is suitable. Water-based materials should be avoided because they will not stick to surfaces when exposed to hot, humid air and water. It is worth using special permanent paints for ceramics and enamels only if you need to apply a pattern to the tile or partially update its appearance. The use of such enamels for large-scale application on walls is impractical due to their high cost.
When completely renovating a tile, the following tile paint is used:
- Acrylic enamel.
- Alkyd
- Oil
- Latex
In this case, the paint should be undiluted, with a consistency reminiscent of thick sour cream.
How to paint your bathroom tiles with your own hands

DIY bathroom tile painting
Before you paint the tiles in the bathroom, you need to prepare the surface. This is important because the paint will not adhere well to glossy, dirty tiles. To clean the dirt from the tile, using a metal sponge and any abrasive agent, stubborn dirt is removed. To degrease the surface, wipe it with alcohol.
Tile painting is carried out as follows:
The joint during painting also needs to be replaced. When fully painted, the tile joints are painted along with the tiles. In case of partial staining, the seams are renewed using a thin brush or special marker... Do not forget that the seams must first be cleaned, degreased and treated with special impregnations. In the photo you can see examples of updating the bathroom interior after painting the old tile.
Although tile belongs to durable and wear-resistant materials, over time, its appearance deteriorates and loses its former attractiveness. If a complete renovation of the coating is not included in the immediate plans, you can try to paint the old tiles in the kitchen. We will talk about all the nuances of work - the choice of paint, preparation of the base and application of the composition - in this article. You will also learn how to achieve a trendy 3d effect and keep the resulting decor for a long time.

How to paint the tiles: paint and brushes
The choice of the coloring composition depends on how large-scale the decorative work will be. If you plan to only partially update the coating, paint individual elements or apply a pattern, special persistent paints - enamels or car enamels - will do. They fit perfectly on a flat ceramic surface, which makes them indispensable for this type of work.
But due to the high cost of enamel products, it is impractical to use them to completely renew the surface. The same applies to water-dispersion-based products. As a rule, tiled kitchens differ elevated level humidity, which does water paints unusable.

A single brush cannot be used to paint a tile, so you have to get a whole set. It should include brushes with different bristles and lengths. Small short-haired ones will be used for finer work, wide ones with long piles - for continuous application over large areas.
Advice! It will be possible to create a matte velvety finish on the tiles with a foam roller.
What color to paint the tiles?
No one can guarantee that the painted tiles will look perfect. Therefore, it is better for an inexperienced master to abandon bright shades in favor of more muted pastel colors. It is necessary to ensure that the tiles do not become the interior center of the kitchen, but act as a pleasant neat background for other design elements.
Painted tiles that will blend in with the wall palette or furniture facades, will be less conspicuous and will not draw attention to possible flaws.
Those who like to "be creative" can act more courageously - they will do bright shades, stencils and templates. Intense colors can help transform a boring ceramic surface into a real mural or painting. As a base, you can use white paint, which will act as a canvas. But it is better to resort to this option when you are confident in your own abilities and good taste.

If the task is simply to refresh and update the coating during the repair, choose a color from the same range, but more saturated. If desired, you can focus on individual elements, painting them in a contrasting tone.
Choice of composition
Suitable options for painting kitchen tiles will be the following compositions:
- acrylic - they are economically consumed and are easy to use, it will be easy to handle them even for a beginner;
- epoxy - the most durable paints that do not wear off, retain their rich color for a long time and are not afraid of moisture;
- latex - resistant to high humidity, do not form bubbles on the surface, have a bright palette and do not exude unpleasant odors;
- silicone - water and vapor-proof mixtures, withstand temperature extremes, cover large gaps well, fit well on almost any coating;
- oil - adhere firmly to the surface, but over time they can crack, which creates difficulties for restoration work;
- alkyd - dry quickly, do not crack or fade, allow you to create matte, semi-matte and glossy effects;
- silicate - have water-repellent properties and low contamination, but due to high alkalinity they have a small color palette.

Preparatory stage
Competent preparation is the key to successful work. It is necessary not only to select consumables and tools, but also to find out if your cladding is suitable for applying coloring compositions.
What kind of tiles can be painted?
Masters claim that any ceramic coating is suitable for painting. The only exception is tiles laid on areas that are constantly in contact with water. These include the floor in any room, the walls of the shower stall and the ceiling in the bathroom, which is constantly exposed to steam. On these surfaces, the moisture index is exceeded, so even the most persistent coloring composition will not last as long as stated by the manufacturer.
In the kitchen, the influence of steam is not as great as in the bathroom, so the scope of application of the paint will be wider. It can be used to paint ceramic flooring, work apron or the entire surface of the walls, if they are tiled.

We select tools
In order for the result of painting work to be as presentable as possible, it is necessary to prepare a set of tools and accessories in advance:
- a soft household sponge, preferably made of foam;
- dry clean rags;
- roller with foam or fine-fleece coating;
- a set of brushes suitable for the selected type of work;
- container or tray for paint;
- a stick for mixing the dye mixture;
- masking tape;
- stationery knife;
- fine-grained sandpaper;
- construction protective film;
- stamps and stencils - if you plan to make an ornament or pattern;
- work suit, respirator, glasses.
Choosing paint
The kitchen is a closed room with specific conditions of the internal environment, therefore, the choice of the composition must be approached from this point of view. As practice shows, the best choice for painting work on ceramics are:
- acrylic paints - a wide variety of shades and ease of use;
- epoxy paints - dry quickly and have almost no smell;
- car enamels - suitable for making patterns and creating accents on the coating.

It is difficult to work with epoxy paints, so for a start it is better to practice in a small, inconspicuous area. This will help you to "fill your hand" and see how the composition will behave on the surface.
In addition to the coloring mixture, you will need other consumables:
- soap solution from any foaming agent (dishwashing detergent, from laundry soap etc.);
- alcohol-based cleaner to remove dirt;
- epoxy primer;
- water or oil based varnish for the finish.

We paint the tiles in the kitchen
Coloring the tiles in the kitchen can become fascinating activity... Unlike laying tiles, the process will not be laborious, allowing you to realize creative ideas and bring creative ideas to life.
Define boundaries
Before you start painting, you need to decide on the area outside of which the paint will not be applied. It is worth focusing on the recommendations indicated above - do not paint the tiles in those areas where frequent accumulation of steam and constant exposure to liquid is expected.
If you wish, you can use paint in these areas, but it should be borne in mind that such a coating will not be durable.
Experienced painters advise painting in "wet" areas around the perimeter or curb - this will protect problem areas and focus on nearby ceramic tiles.
Prepare the surface
Any type of coloring composition will only fit well on a thoroughly washed and treated surface. First of all, the tile must be cleaned of contamination, paying special attention to areas near kitchen stove where a whole fat layer forms over time.

If cracks are found when examining the seams, they will have to be repaired. For this, in problem areas and seams are filled with a cement grout. After the cement has dried, the tiles must be washed again, removing the remnants of the material.
A soap solution is used to remove grease and dirt, and a hard dish scraper or cleaning powder will help to enhance its effect. After degreasing, the surface must be removed from the soap layer - for this purpose, use a rag dipped in vinegar, which neutralizes alkali well.

A solution of purified water and ammonia in a ratio of 1 to 1 will best deal with the removal of "soapiness".
Apply paint base
If you plan to completely cover the tile with paint, it is recommended to process the base with fine-grained emery paper for better adhesion. But when it comes to cladding large area, sanding will be laborious and time consuming. In this case, it would be wiser to use a primer instead of sandpaper, which improves the adhesion of the tile with the dye.
For these purposes, it is recommended to select a special primer - it should be labeled as a primer for glass, fiberglass, plastic or ceramics. A quality product will not only provide excellent adhesion, but will also help mask areas with cracks, chips and other flaws.
The next step is started only when the primer is completely dry. Although the instructions for some drugs indicate that they dry in literally an hour, the masters advise to wait about a day.

Artwork
The algorithm for staining ceramic tiles is no different from the treatment of any other surface. First, it is necessary to protect the areas that will not be painted - the floor is covered with construction film, and the edges of the tiles are pasted over with masking tape. He can also create certain configurations and geometry of painting according to a pre-planned pattern.
If stencils are prepared for creating ornaments, they are also glued at this stage.
The easiest way to use templates is ready-made drawings and ornaments that you just need to circle or fill with paint. Thus, you can create themed interior in the kitchen - arrange corners or emphasize in its center. Another option is to create a continuous ornament - it can run along the perimeter of the tiled zone, decorate only the upper, right or left parts.

Important! You need to glue tape and patterns so that their edges fit snugly to the base. The paint will leak through the loose areas and the pattern will turn out to be sloppy.
If the area to be painted is large, it is best to use a roller with a dense short nap. It will be possible to cope with small volumes of work with the help of a paint brush, it is also used to paint over hard-to-reach areas and to make out individual fragments of ceramics. The strokes should be confident and uniform, without streaks or gaps.
Choose a color for the seams
The simplest option for staining the seams is solid, when the inter-tile space is given the same color as the main area of the tile. If you want to create a striking contrast between the seams and the tiles, you will have to put in a lot of effort. First, the seams are pasted over with masking tape and the entire tile is painted over in a basic shade.
After the paint layer has dried, the tapes are removed and glued to the tile so that the seams remain free. Then the inter-tile space is painted over with the selected shade and left to dry.
The color for the seams can be selected based on contrasts - white / black, yellow / black, blue / white. One more design reception- selection of similar pigments from one palette - pale lilac and deep violet, blue and azure, beige and brown, etc.
Protect the new coating
As a finish, you can use a clear water-based urethane varnish to protect the coating and help fix the ornament. The area is opened with varnish in 2-3 days, when the last layer of paint is thoroughly dry. The varnish is applied with a thin brush in two layers, with a roller - in one thick layer.

The tiles on the floor that have been renewed with paint, as well as the tiles on the wall painted with oil paint, must be varnished.
Create ceramic paintings
If you have basic artistic skills, you can try to create a panel painting on ceramics. The tile set aside for the painting must be degreased and treated with fine-grained emery paper. On the plane of the tile, the drawing is applied with a pencil, and the contours are outlined with a thin brush with oil paint.
After 30 minutes, when the contour "grabs", the elements of the drawings are filled acrylic paint for ceramics.
The acrylic composition must be applied with dotted movements, holding the brush at right angles to the surface.

Use it wisely
Painted tiles require more gentle handling than ordinary tiles. Prolonged exposure to steam, liquids, high and low temperatures can spoil even the highest quality coating. Epoxy enamels crack when exposed to direct sun rays, and oil paints swell on prolonged contact with water.
Ceramics with ornaments and paintings must not be washed with hard brushes, rubbed with abrasives and cleaning powders. It is better to choose acid-free detergents that do not corrode the pattern.
How many coats do you need to apply?
One layer of paint is enough only if it is the basis for applying the ornament. In this case, you should not make it too thin - the new dye should cover the previous shade well.

In most cases, the paint is applied in two layers, and if there is a need to make the shade as saturated as possible, a third layer is applied. Each previous layer must dry for at least 12 hours, depending on the type of composition. Re-coating of tiles is done perpendicular to the previous one - so the surface will be processed more thoroughly.
Decor secrets
How to achieve a 3D effect?
The 3d effect involves the creation of a volumetric relief pattern on ceramic tiles. On our own you can implement this approach with gauze, from which certain shapes are cut. They are attached to the surface of the tile, and a primary layer of enamel coating is applied on top.

After the enamel has completely dried, take a coarser roller and paint of a different palette and paint over the gauze pattern again.
How to keep a drawing for a long time?
To prevent the paint from rubbing and looking like new for a long time, it is necessary to give it time to dry completely - this usually takes about 3 days.
Not only water-based epoxy varnish, but also oil-based polyurethane will serve as a good protection for the picture. Oil coatings dry longer than water coatings, but serve as an excellent moisture barrier, protect the surface from scratches for a long time and are characterized by a long service life.
Apply the varnish in two layers - but first you need to make sure that the components varnish coating compatible with paint components that have been applied to ceramics.
Photos of work before and after
A photo selection of works before and after will help to make an impression about the options and results of painting the tiles.


If such a need arises, you can paint the tiles in the bathroom without the involvement of specialists. However, it is necessary to choose the right paint, prepare the surface, use the special painting techniques described in this manual.
Traditionally, tile is considered the best wall, floor covering for rooms with high humidity. The average resource of the finishing material is 25 years or more. Naturally, during this time, the bathroom interior becomes outdated / annoying many times. The main tasks that are solved by painting tiles in the bathroom are:

 Painting work is performed an order of magnitude faster than laying tiles.
 Over time, the interiors get bored, and the tiles are too expensive to buy its collections every 5 years to implement fresh design solutions. Therefore, it is easier to apply paint and varnish compositions in some areas in fragments or paint the entire surface in the color of interest to the user.
Floor and wall coverings undergo restoration - mosaics, tiles, porcelain stoneware.
Tile staining technology
The method of applying paint on a tiled floor or bathroom walls depends on the properties of the paintwork - covering ability, mat / gloss, moisture resistance, UV resistance, viscosity, drying time, adhesion to the substrate. Usually, brushes, rollers, spray guns, aerosol cans are used for applying a background, painting large surfaces, a sponge, brushes for making a pattern, ornamentation on a stencil.
Surface preparation
In this particular case, the base is the decorative surface of the existing ceramic tile and the joints between them. In the standard version, the grout is slightly recessed relative to the front surface of the tile. Therefore, there are two options for decorating walls, floors:

Floor tiles can be unglazed and glazed, wall tiles are always glazed. Any paint, even with the highest adhesion to the base, will peel off from a smooth cladding after a month of operation. Therefore, the surface of the tile is sanded with an electric, battery-powered power tool with abrasive equipment - orbital angle grinders, belt grinders, vibration grinders. It is almost impossible to scratch the glaze by hand with a sandpaper. At the same time, grinding allows you to get rid of dirt, lime deposits.
The main operations in preparation for staining tiles are:
- removal of furniture, accessories, hygiene products;
- dismantling of wall cabinets, shelves, lighting fixtures, mirrors;
- grinding the tile to give the surface a granular structure;
- dedusting and degreasing with compositions compatible with the selected paints;
- pasting of plumbing fixtures at the points of interface with tiles with masking tape.
In the inner and outer corners of the walls, tiles are often framed by corners, aluminum, plastic, steel profiles. These decorative elements are usually embedded under the edge of the tile. Masking tape of such a small width does not exist; it is very difficult to cut it exactly along the length of the roll.
Therefore, at first, masking tape is glued along the edge of the corner with an overlap on the other side. After painting one wall, the masking tape is removed, re-glued on the contrary, with an overlap on the already painted plane.
Seams, if necessary, are sealed with non-shrinking quick-hardening putty mixtures, for example, starting Knauf FugenFuller. Finishing putties shrink, dry for a long time with a large layer thickness, cost at least one and a half times more than starting non-shrinking fast-hardening materials.
The starting putty is much stronger than the finishing putty, it is very difficult to grind it and it takes a long time. Therefore, irregularities are smoothed out as smoothly as possible before the layer hardens in the tile joints with a spatula.
Selection of paints and varnishes
Any paint consists of several main components. Pigments are responsible for the color of the composition, black and white paints are called achromatic, chromatic colors. To form a film, binders are added to the paints - polymers, oils, hydrocarbons, bitumen resins.
Solvents regulate the viscosity of paintwork materials, their chemical composition must be compatible with the binder used in the paint. Fillers are used to improve properties. For example, matting additives increase adhesion, abrasion resistance, fire protection, color uniformity.
For a bathroom with tiled walls and / or floors, the following paints and varnishes are suitable:

Polyurethane paint costs from 450 rubles / kg, the film layer is resistant to shock loads, abrasion, solar ultraviolet light, moisture, high temperatures. Inexpensive epoxy enamels (from 150 rubles / kg) are poorly tolerated hot water, otherwise their properties are similar to those of polyurethane paints.

The price of oil paints is similar to that of epoxy enamels. This finishing material easier to work with, it has a high hiding power. However, drying in air without heating increases the time and decreases the strength of the film layer. Oil paints quickly eroded with powders, detergents, they will have to be additionally varnished.

Alkyd enamels with a price of 150 rubles / kg have an additive to reduce abrasion floor covering in passages - rosin. There are semi-matte and glossy formulations with moisture resistance as a base bonus. Varieties of alkyd paint are glyphthalic enamels GF and pentaphthalic PF. They are applied to the FL primer, usually floor coverings are painted with these paints and varnishes.

Some home craftsmen use the so-called rubber paint in an aerosol can or buckets to make up the tiles inside the bathroom. In fact, the dispersive paint and varnish material contains fungicides, pigments, preservative, coalescent plasticizer, antifreeze and latex.

In such paints there is no solvent, they do not smell, ideal for closed, unventilated rooms. The price of 1 kg of paint, packaged in buckets, starts at 250 rubles.

Slate paint is another popular solution for home craftsmen. This composition processes school boards, so the second popular name LKM has become "chalk paint". This facing material possesses properties:
- non-toxic, safe for humans;
- does not support or spread combustion;
- forms an absolutely matte surface without glare;
- adhesion to the base is very high;
- the film layer is resistant to abrasion, mechanical damage.

A liter of slate paint costs from 1000 rubles when packed in cans / buckets or one and a half times more expensive in an aerosol can.
For oil, epoxy and polyurethane paints, the tiles must first be coated with a layer of primer. In this case, the soil should be composed of an organic, and not an aqueous solvent.
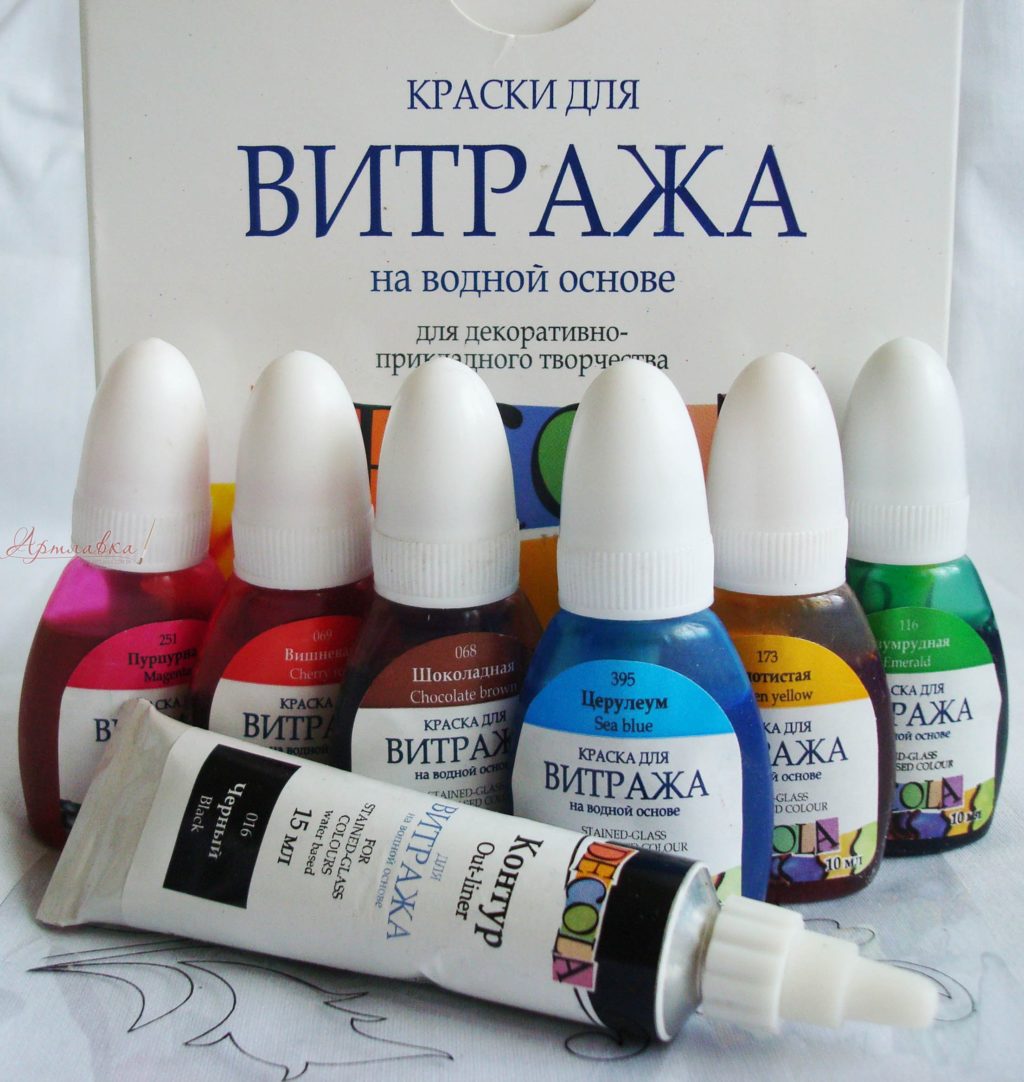
Drawings, ornament, patterns are applied to the base background with special expensive stained glass paints.
Application methods
Before painting the tiled walls and floor of the bathroom, you should take into account the nuances:

 Using a stencil for painting tiles in the bathroom.
 Thus, the choice of painting technology and tools for the vast majority of owners and tenants of real estate in apartment buildings small. A roller and a brush are used to create a uniform background, solid color. A sponge, stencils, brushes, respectively, are used to apply an ornament, a pattern, and a drawing by hand.
Painting the walls
The main rules of painting work during the restoration of old tile cladding on the walls of the bathroom are:

With a brush and a roller, paint is applied to the matte surface of the tile along the seams. At first, they are usually painted with a brush, the abutment of the walls to each other, the sides of the bath, the ceiling, and the floor. Then the remaining flat surface is covered.
Cosmetic repair of flooring
By analogy with the corridor, the bathroom, by default, is one of the most walk-through areas in the apartment. Therefore, a floor tiled with porcelain stoneware must be covered with wear-resistant compounds. The best options are auto enamels, slate, epoxy, polymer paints.
 Tiled bathroom floor painting.
 An example of self-painting an existing floor tile with chalk paint to update the interior of a room during cosmetic repair given in this video
The main nuances in this case are:
- plumbing remains in place, only removable screens / bath panels are dismantled;
- a light background on a dark tile will have to be applied in several layers and, conversely, the white tile is painted over with dark paint in one go;
- work starts from the corner farthest from the door, ends near the doorway;
- floors are usually painted last after ceilings and walls.
Spray cans, sprayers, spray guns are rarely used here, since the floor area is small.
Fragmentary staining and decoration
Plain walls and floors are often diluted with patterns, drawings, ornaments and other design solutions to increase the decorative value of interiors. The most simple solution is the fragmentary coloring of the tiles.
 Painting tiled walls in different colors.
 Most often, the following ideas for redecorating a bathroom are implemented:

Tile joints after cosmetic repairs can remain masked with the same paintwork tone or additionally highlighted with a dye composition that is bright in relation to the base color.

This method allows you to inexpensively restore a tile that has lost its artistic value.
By analogy with three-dimensional pictures on concrete floors tile can have.

However, this will require the help of a specialist. On the other hand, specialists have developed hundreds of typical black-and-white drawings with the effect of volume, which can be implemented in projects on their own.
 Simple black and white 3D drawing.
 First, a general white background is created, since it is easier to cover it with a subsequent layer of black paint. Or a 3D drawing is immediately drawn on the existing tile, two tones are superimposed sequentially after drying. In this case, the masking tape will have to be glued twice, first for the black paint contour, then for the white enamel, or vice versa.
To increase the resource of the paintwork, it is often opened with varnish by analogy with the method of restoration of the bath enamel. For this, we use ready-to-use yacht varnishes or polymeric two-component car varnishes that are blended immediately before use.
Thus, the technology of staining tiles can be used not only for budget redecoration of the bathroom, but also to increase the decorative value of the existing wall and floor covering.
Advice! If you are looking for a bathroom remodeler, there is a very convenient recruiting service from. Just fill in the details of the order, the masters will respond by themselves and you can choose with whom to cooperate. Each specialist in the system has a rating, reviews and examples of work, which will help with the choice. It looks like a mini tender. Placing an application is FREE and non-binding. Works in almost all cities of Russia.
If you are a master, then go to, register in the system and you will be able to take orders.